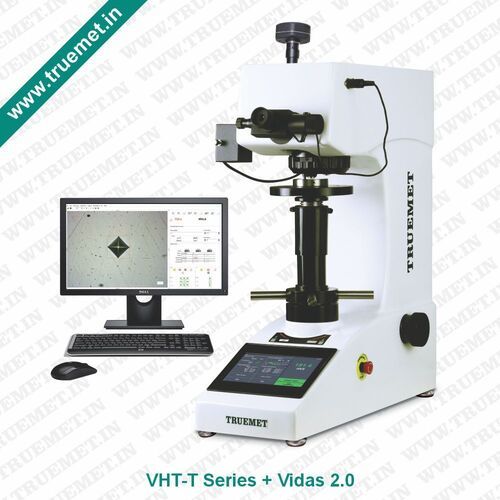
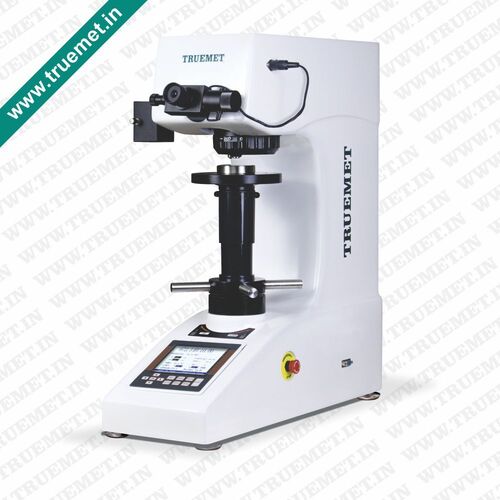
Touch Screen Vickers Hardness Tester (VHT-T Series with Vidas 2.0)
Touch Screen Vickers Hardness Tester (VHT-T Series with Vidas 2.0) Specification
- Equipment Type
- Touch Screen Vickers Hardness Tester
- Resolution
- 0.01 HV
- Number of Specimens
- Multiple (sequential testing possible)
- Automation Grade
- Semi-Automatic
- Frequency
- 50-60Hz
- Temperature
- 10°C to 40°C
- Operating Voltage
- AC220V±5% 50-60Hz
- Measuring Range
- Testing force 10gf to 1kgf
- Display Type
- 7-inch Color Touch Screen
- Hardness
- Vickers scale, 1HV - 3000HV
- Max Height
- 630 mm
- Response Time
- Real-time measurement, <2 seconds per reading
- Test Range
- 1HV - 3000HV
- Port Size
- Standard specimen port
- Application
- Hardness measurement for metals, alloys, and small precision parts
- Humidity
- ≤85%
- Dimension (L*W*H)
- 585X200X630 Millimeter (mm)
- Features
- Automatic turret, motorized stage, image analysis, data storage, statistical analysis
- Mounting Type
- Benchtop
- Accuracy
- ±1% of indicated value
- Interface Type
- USB, RS232
- Power Supply
- AC220V±5% 50-60Hz
- Specimen Size
- Maximum 200mm width, up to 100mm thickness
- Usage
- Industrial material testing, Laboratory, Research
- Capacity
- Single specimen, manual/sample tray
- Machine Weight
- 42 Kilograms (kg)
- Test Speed
- Standard speed as per Vickers protocol
- Test Width
- 200 mm
- Test Stroke
- Up to 100 mm
- Control Mode
- Touch Screen with Vidas 2.0 software
Touch Screen Vickers Hardness Tester (VHT-T Series with Vidas 2.0) Trade Information
- Minimum Order Quantity
- 1 Number
- Payment Terms
- Cheque, Telegraphic Transfer (T/T)
- Supply Ability
- 1 Number Per Day
- Delivery Time
- 1 Week
- Main Domestic Market
- All India
About Touch Screen Vickers Hardness Tester (VHT-T Series with Vidas 2.0)
FeaturesMANUAL EYEPIECE :Equipped with 10x Manual Eyepiece to measure the length of diagonal. The hardness value can be displayed directly on LCD screen by entering the indentation diagonal length.
CAMERA PORT :Machine equipped with dual optical channel, one optical channel for 10X eyepiece and another optical channel is for camera by which machine can be upgraded into computerized model. Both optical channel works simultaneously.
ILLUMINATION SYSTEM :Halogen illumination unit with adjustable intensity gives very clear images and can be also used as a simple microscope. Halogen illumination unit enter stand by mode after a certain period of inactivity which gives it a long service life and low power consumption.
TURRET MECHANISM :Equipped with manual turret mechanism. The position of the indentor and objective lens can be switched manually.
DATA OUTPUT :Equipped with built is thermal printer to take the print out the hardness result USB port is also available to get the data in pendrive.
TEST FORCE :Wide range of test force can be selected with external force selection knob. The test force is automatically displayed on the 7 inch LCD touch display.
LCD TOUCH SCREEN PANEL :7 Inch LCD touch screen can visually display the hardness value, conversion hardness, test force, dwell time, statistical data, upper & lower limit and brightness of optical system.
EMERGENCY SWITCH :Equipped with emergency stop switch.
Advanced Optical and Control System
Benefit from a high-resolution CCD camera with autofocus, ensuring each indentation is accurately captured for ultra-precise measurement. The intuitive 7-inch color touch screen with integrated Vidas 2.0 software offers effortless navigation, analysis, and device control. The motorized 4-position turret and automatic stage movement streamline multi-specimen testing, improving workflow and productivity.
Superior Data Management and Analysis
Store up to 5000 test results with robust statistical analysis tools provided by Vidas 2.0. Export data in CSV or PDF formats, or connect directly to a PC using USB or RS232 interfaces. This seamless integration ensures traceability and facilitates efficient documentation, making it ideal for both industrial and laboratory environments.
Durable Design & Safety Features
Constructed for stability and durability, the tester incorporates overload and power surge protection for uninterrupted operation. Suitable for environments with humidity up to 85% and temperatures from 10C to 40C, the device adheres to strict Vickers protocol standards, ensuring reliable, repeatable results on every test.
FAQs of Touch Screen Vickers Hardness Tester (VHT-T Series with Vidas 2.0):
Q: How does the VHT-T Series Touch Screen Vickers Hardness Tester ensure accurate readings?
A: Accuracy is achieved through auto-calibration, a diamond pyramid indenter, and a high-resolution CCD camera with autofocus. The Vidas 2.0 software further enhances measurement precision by providing real-time calculation and statistical analysis, maintaining accuracy within 1% of the indicated value.Q: What types of specimens and materials can be tested using this equipment?
A: This tester is suitable for a wide range of metals, alloys, and small precision parts. It accommodates specimens up to 200mm width and 100mm thickness, making it apt for industrial, laboratory, and research applications involving diverse sample sizes and types.Q: Where can the results from the hardness tests be stored or exported?
A: You can store up to 5000 test results within the machine. For external analysis or reporting, data can be exported as CSV or PDF files, or transmitted directly to a PC via USB or RS232 connections, ensuring flexible and secure data management.Q: When should I utilize the auto-calibration feature of the tester?
A: The auto-calibration feature should be used whenever you begin a new series of tests, change the test indenter, or after a significant number of measurements. This ensures consistent, reliable, and accurate results throughout the units operational lifespan.Q: What is the testing process with the VHT-T Series?
A: Place your specimen on the stage, select the testing parameters via the touch screen, and initiate the test. The automatic turret selects the appropriate objective and indenter, after which the camera captures the indentation for analysis. Results are processed in less than 2 seconds per measurement.Q: How does the Vidas 2.0 software benefit daily operations?
A: Vidas 2.0 provides advanced image and statistical analysis tools, automates data handling, and simplifies result documentation. Its intuitive interface enables swift parameter selection and real-time measurement, reducing manual errors and increasing throughput.Q: What operational environments are suitable for this hardness tester?
A: The VHT-T Series operates efficiently in environments with temperatures between 10C and 40C and humidity up to 85%. Its sturdy benchtop design makes it ideal for manufacturing, laboratory, research, and quality assurance settings throughout India.


More Products in Vicker Hardness Tester Category
Load Cell Based Digital Vickers Hardness Tester (THT-AD Series)
Minimum Order Quantity : 1 Number
Machine Weight : 42 Kilograms (kg)
Dimension (L*W*H) : 585X200X630 Millimeter (mm)
Power Supply : AC220V±5% 5060Hz
Application : Metallographic hardness testing, lab/industrial use
Test Range : 53000 HV (Vickers Hardness)
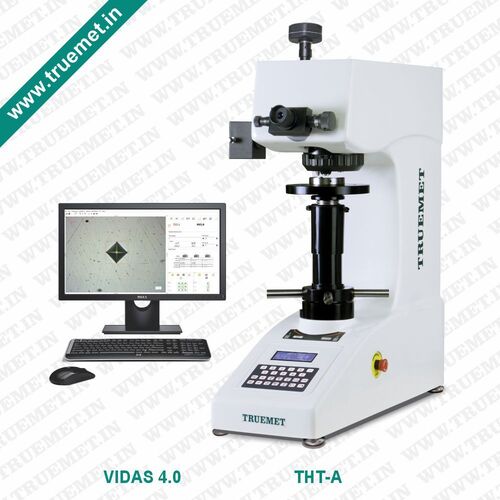
Computer Controlled Load Cell Based Vickers Hardness Tester (THT-A Series with VIDAS 4.0)
Minimum Order Quantity : 1 Millimeter
Machine Weight : 42 Kilograms (kg)
Dimension (L*W*H) : 585X200X630 Millimeter (mm)
Power Supply : AC220V±5% 5060Hz
Application : Metals, alloys, ceramics, surface coatings
Test Range : 5HV – 2900HV
Touch Screen Vickers Hardness Tester (VHT-AT Series with VIDAS 4.0)
Minimum Order Quantity : 1 Number
Machine Weight : 42 Kilograms (kg)
Dimension (L*W*H) : 585X200X630 Millimeter (mm)
Power Supply : AC220V±5% 5060Hz
Application : Metallurgical laboratory, quality control, research, engineering
Test Range : 1HV~2967HV (Vickers Hardness Value)
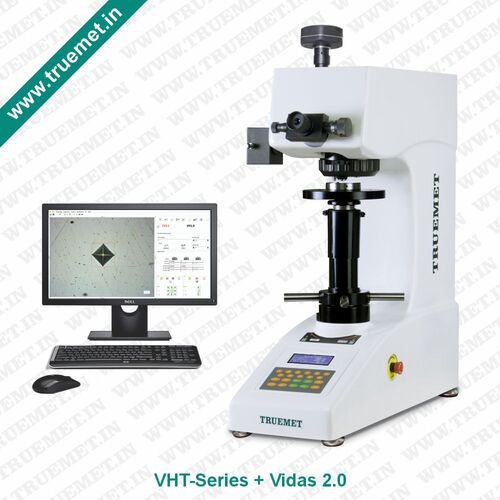
Vickers Hardness Tester (VHT-Series with Vidas 2.0)
Minimum Order Quantity : 1 Number
Machine Weight : 42 Kilograms (kg)
Dimension (L*W*H) : 585X200X630 Millimeter (mm)
Power Supply : AC220V±5% 5060Hz
Application : Suitable for thin sheet, surface/carburized, coating and micro components
Test Range : 53000 HV

 Send Inquiry
 Send Inquiry


